When collecting clocking data by USB datastick there is no need to add a terminal to the software. The first step is to follow the instructions for downloading the information from the terminal on to a USB datastick. Once you have completed this, plug the USB stick into the computer.
Then from the top menu of InfoTime go to Configuration – Import Clocking Data (Fig 1).
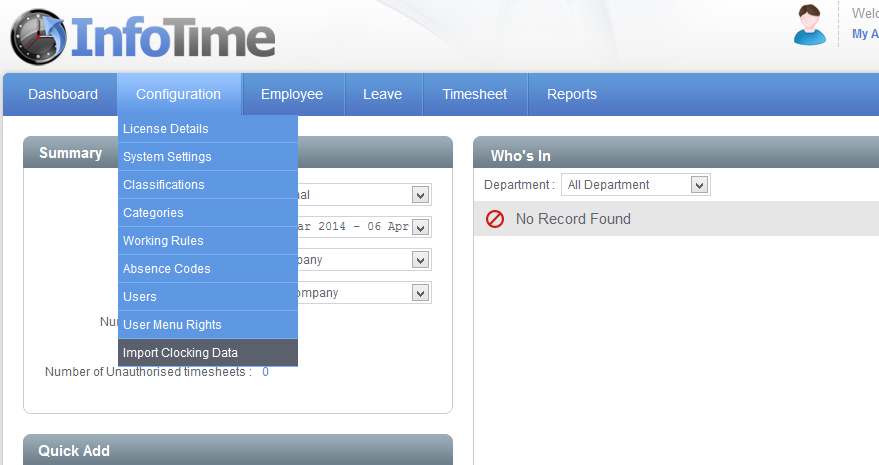
Fig 1
The Import Clocking Data screen will load. (Fig 2).
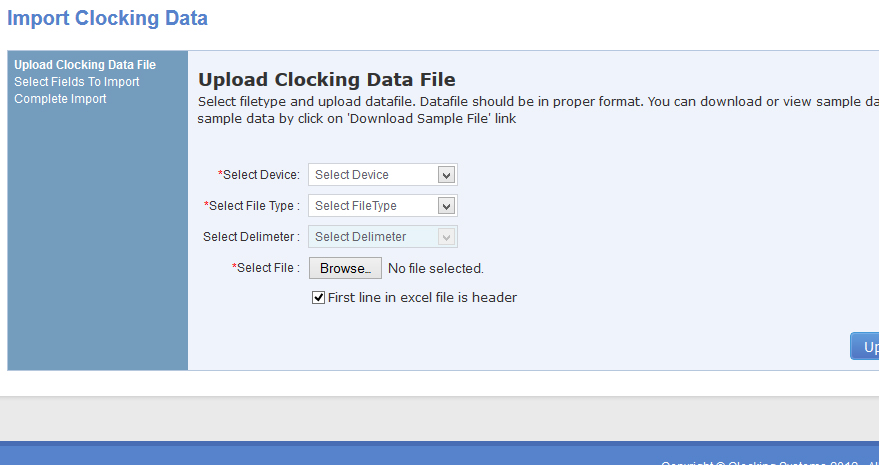
Fig 2
You must complete each section marked with a * to proceed with the import.
First click the drop down menu for Select Device Type. From the list of possible device types select the correct type for your clocking terminal.
Once you have entered the Device Type click on the box marked Select File Type. For either the Fingerprint Terminal or the Proxy Card the File Type should be USB File (*.KQ, *.NKQ). For the Face Scanner the File Type should be Fixed Format File (*.txt).
The Select Delimeter field should not be selectable.
Once you have set the Device and File Type click Browse. A screen will load which you can use to locate the file you wish to import. Browse to the location on your USB stick where the file has been created (Fig 3).
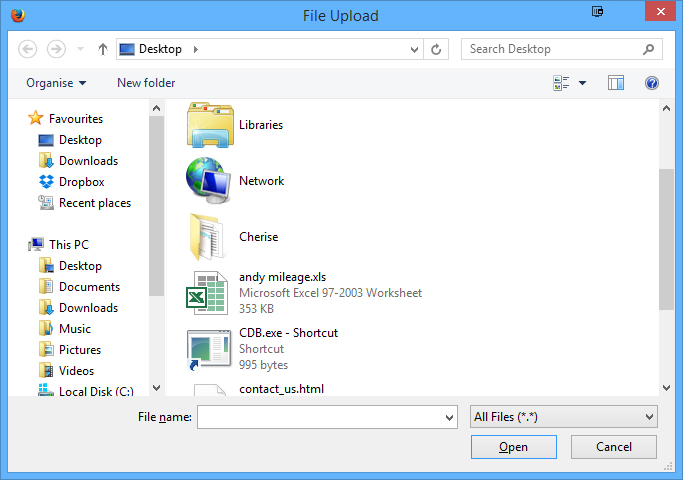
Fig 3
Once you have selected the file to upload click Open. A new screen will load asking you to select the fields to import (Fig 4).
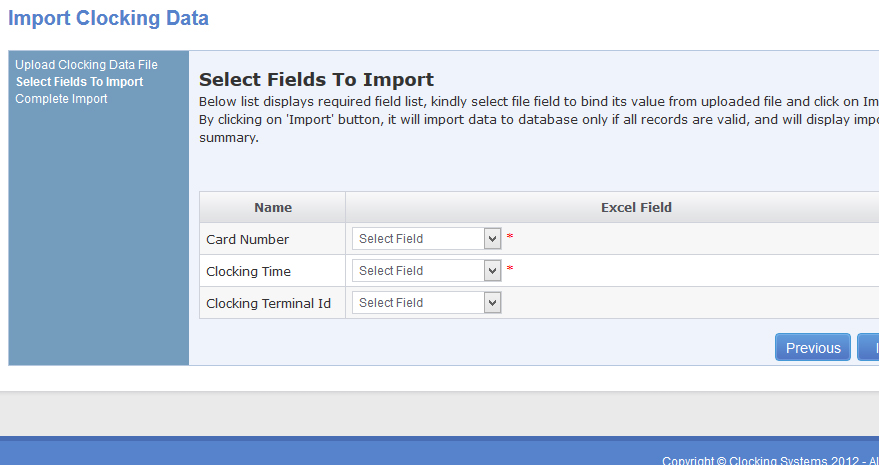
Fig 4
Click the drop down field for Card Number and select ID from the list.
Click the drop down field for Clocking Time and select time from the list.
Click the drop down field for Clocking Terminal ID and select dev_id from the list.
Once you have set these fields click Import.
After the Import has finished an import report will be shown (Fig 5).
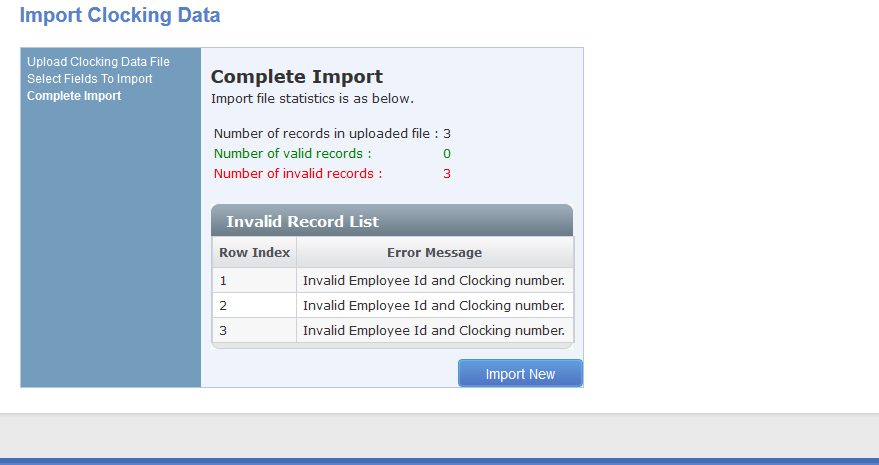
Fig 5
The report shows the number of clocking records in the file, the number of valid records that have been imported into the system and the number of invalid records that the import has rejected. It will then list which records have been rejected along with the reason.